Iintroduction:
To color and assemble comic pages with Photoshop it
is absolutely foundamental to work with files of 300
DPI resolution at least, if not 600 DPI (usually for
black & white comics), if you'll ever hope to
see your work published on paper one day;even if you
only do webcomics, remeber that somebody will ask
you one day for printable copies of the pages.
By the way, lettering with photoshop
requires only a 72 DPI copy of your page, as a reference
to place the balloons, the text and the captions.
This 72 DPI page is only a reference, you'll have
to delete it before exporting the lettering file.
Macromedia Flash: why?
- Softwares like Adobe Illustrator are slow to
open and close. Vector based graphic softwares slow
and weighty to load as the traditional graphic ones...
that's why I don't use them. Flash runs and executes
any task immediatly, without loading times and without
slowing down your computer.
- Managing balloons and texts is incredibly easy
and fast: most of all, when your text is written
down fitting the balloon around it takes only a
click or 2, even if you previously drawed it too
large, too short, too big or too small.
- You can export your lettering page in every
resolution you need and in every file type.
Lettering a 72 DPI page and exporting it even in
1200 DPI if needed, witouth the slight loss of quality,
ready to be pasted on your photoshop Hi-Res page.
Flash tools for lettering:
- A 72 DPI page, jpg,
gif or bitmap;
- A lettering font -
I suggest the Comic Book Commando that is
freeware, you can download
it here
- Oval tool (4) set it with white fill and black
line contour
- The Arrow (1)
- The Line tool (2)
- The Free Transform
tool, to rotate, resize and more (5)
- The Paint Bucket tool
(7)
- The Text tool (3)
- The Eyedropper tool,
to get the colour or the line tightness form
the other balloons if needed (8)
- The Ink Bottle tool,
to change the color and tightness of the lines,
if needed (6)
- The line color, set
on black, and the fill color, set on white, tools 9 and 10
Instructions:
On photoshop save a low-res 72 DPi copy of your
comic page ( Image > Image Size > Resolution).
Import the low-res page to Flash (File
> Import).
Lock
the page layer with the Lock,
to work better.
3) create a new
layer, on wich you'll write all
the texts and draw the balloons.
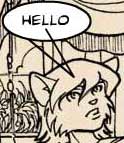
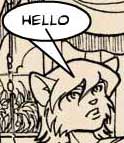
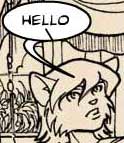
4) Click the Oval tool,
take care that the fill is set on white and
the line is black; draw an oval to fill later
with text, as in the picture below. |
Tools - pic. 1 |
As you can see the balloon
(1 on the pic) is done directly with
the black contour that you can tighten as you
please after it's done, setting a different
number on the Properties - as in the
pic here on the right, #2. Window > Properties
to open the panel.
Click the border with
the arrow (1 tool) and change the number
on the properties panel to tighten the line.
Here
is the result, line border #3
Double click the balloon: you'll have it all selected,
the contour line and the filling. Try to rotate
distort, resize, copy and paste it, just to
practice. See how it's easy to manage? |
 |
Click on the Text tool (3). On the Properties panel,
make sure the color is black and the font is
the one you need (to me, comic book commando
as you can see in the image below). Here are
the text options:
- font
- font size
- font color
- bold and italic
- alignment
- the text when it's
written on the page
|
 |
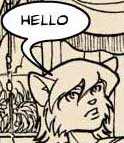
Once the text is written we need to resize
the balloon, that is too big. Double click it
with the arrow tool (1) and resize it
with the transform tool (5) as you see
on the images below
|
 |
Now
the balloon is ok.
We only need the pipe. You can do it with the
Line tool (2) drawing 2 V lines, as in
the 1st pic below; then fill it with the bucket
tool with white color and curve it with the arrow.
Then, hust delete the lines you don't need (last
image of the row). |
|
|
|
|
Line
tool (2) |
Paint
Bucket (7)
- fill the empty space with white |
Arrow
tool (1). Drag the lines curving them
until you like the result. |
Delete
the lines you don't need selecting them with
the arrow and hitting DEL. |
That's all. Time needed
to do a balloon: about 1 minute. Remember now
that you can reuse this balloon copying, pasting,
rotating, deforming and resizing it at your
will, to fit it for other comic panels! This
will save you time. You can also do rectangular
captions with the rectangular tool (near the
oval one). For sound FX, add noises - it's all
up to your imagination and a good font.
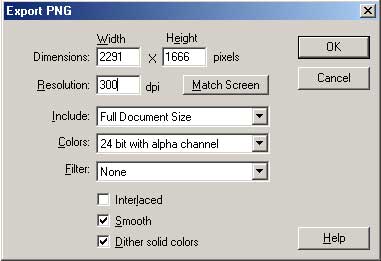
After the page lettering is done you need to
export a 300 DPI file to open with photoshop
and drag on the Hi-Res page. So you need to
delete the page layer leaving only the balloons
and text one. Hiding the page is not enough,
delete it, then export a transparent PNG 300
DPI (or 600 or whatever is your Hi-Res page
size) - File > Export. |
If you aren't sure about
wich PNG settings use to export your lettering
just remember to give him the same resolution
of your page and that it has to be trasparent
(24 bit with alpha channel).
You can also copy the
settings in the image on the right.
That's all!
Serena
www.furaffinity.net/user/vixinecomics/


|
|
|